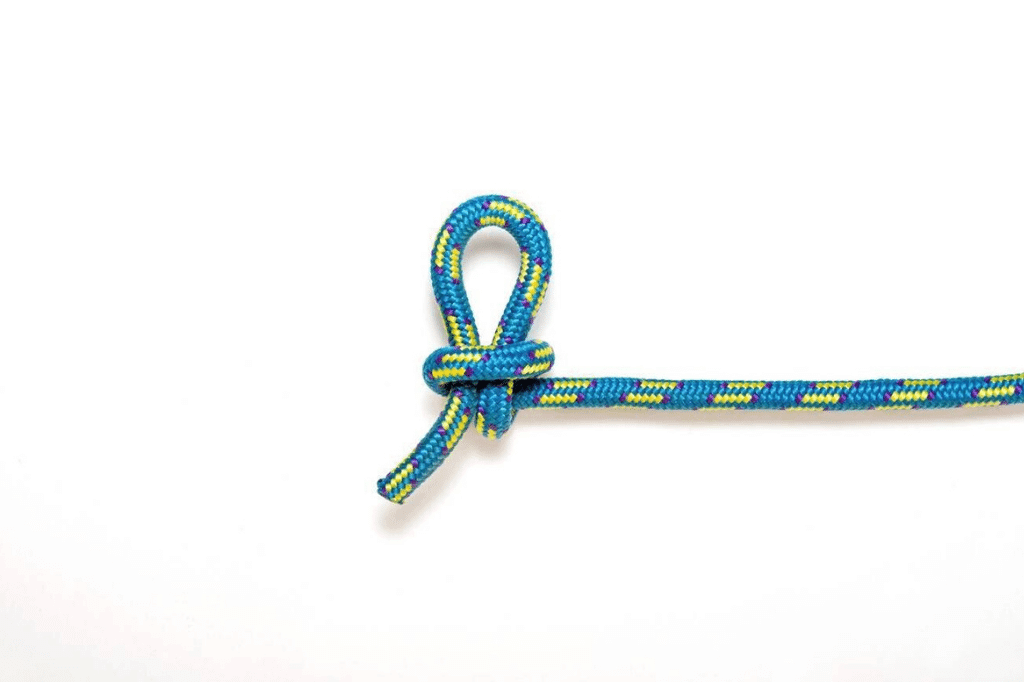
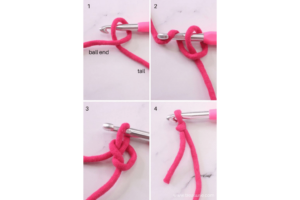
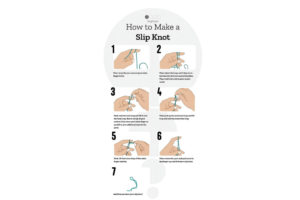
The slip knot is an essential skill for various crafts and outdoor activities, offering both functionality and ease of use. This versatile knot serves as the starting point for knitting projects, enabling yarn to be easily adjusted as stitches are formed.
It’s also a go-to choice for fishermen, climbers, and campers who require a quick-release knot. The simplicity of tying and untying a slip knot makes it a fundamental technique to master. Its adjustability and secure hold make it invaluable in situations where a non-permanent knot is needed. By learning to tie a slip knot, you equip yourself with a practical tool that can be applied in countless scenarios.
Introduction To Slip Knots
Slip knots are a fundamental part of knot tying. They create adjustable loops. People use them in various tasks. This type of knot is easy to tie and untie. It tightens when pulled on one end. This makes it useful for many applications.
Essential Uses In Everyday Life
Slip knots serve multiple purposes in daily activities. They are not just for sailors or climbers. Here are some common uses:
- Securing shoelaces for a quick release.
- Creating adjustable necklaces or bracelets.
- Attaching luggage tags securely.
- Gathering the opening of bags or sacks.
These are just a few examples. You can find slip knots in many other scenarios.
Historical Significance Of Knot Tying
Knot tying dates back thousands of years. It has been crucial for survival and development. The slip knot’s history is equally rich. It has been a key element in:
- Fishing and boating for securing lines quickly.
- Agriculture for bundling crops and repairing fences.
- Construction for hoisting materials and securing loads.
Throughout history, slip knots have helped people solve everyday problems. Their simplicity and versatility have made them timeless.
Materials You Will Need
Mastering the art of tying a slip knot starts with gathering the right materials. Quality rope and handy tools are essential for a secure and functional slip knot. Let’s dive into what you’ll need to begin your knot-tying journey.
Choosing The Right Type Of Rope
Selecting the proper rope is crucial for a strong slip knot. Consider the rope’s thickness, flexibility, and material. Here’s a simple guide to help you pick:
- Nylon ropes offer great strength and elasticity.
- Cotton ropes are softer and easier on the hands.
- Polypropylene ropes float and work well for water applications.
Match the rope to your task for the best results. Thin ropes are great for small projects, while thicker ropes suit heavy-duty tasks.
Additional Tools For Knot Tying
Aside from rope, a few tools can make knot tying easier. Look at this list:
| Tool | Use |
|---|---|
| Fid | Helps thread rope through tight spaces |
| Shears | Cuts rope cleanly |
| Gloves | Protects hands during knotting |
Keep these tools close by for a smooth knot-tying experience.
Step 1: Loop Creation
Creating the perfect loop is the foundation of mastering the slip knot. It’s a skill that is not only easy to learn but essential for various crafts and activities. Let’s dive into the specifics of loop creation, ensuring your slip knots are strong and reliable every time.
How To Make A Perfect Loop
To start, lay the rope on a flat surface. The rope should be smooth and free of tangles. Grasp the rope with both hands, about 30 centimeters apart. Now, make a loop by crossing the right end over the left. Hold the crossover point between your thumb and forefinger. This will form the base of your loop.
- Place rope on a flat surface
- Grasp rope with both hands, spaced out
- Cross right end over left to form a loop
- Secure the crossover point
Ensure the loop’s tail is on top. This detail is crucial for the next steps in tying a slip knot.
Common Mistakes To Avoid
Even simple tasks have potential pitfalls. When creating a loop for a slip knot, certain errors can weaken the final knot.
| Mistake | Impact |
|---|---|
| Over-tightening the loop | Makes adjustments difficult |
| Loose crossover | Causes knot to fail |
| Ignoring rope twist | Compromises knot strength |
Keep the loop loose for now. Avoid twisting the rope as it can lead to a weak knot. Always double-check the crossover is not too loose; it should be snug but adjustable.
By paying attention to these details, you’re on your way to creating a solid slip knot. Remember, practice makes perfect. With each attempt, the process will become second nature.
Step 2: The Twist Technique
Mastering the Step 2: The Twist Technique is crucial for a secure slip knot. This step ensures the loop’s stability and adjustability.
Executing The Basic Twist
To start, hold the rope’s end and make a loop. Keep the tail end on top. Now, twist the loop by crossing the tail end over the standing part. This creates a basic twist that is essential for the next steps.
- Hold the rope end securely.
- Form a small loop.
- Ensure the tail end is over the standing part.
- Twist the loop once completely.
Troubleshooting Your Twist
Sometimes the twist might not hold well. Let’s fix that!
- Check if the rope is slippery. Use a rougher rope if needed.
- Ensure the tail end is long enough to hold the twist.
- If the loop untwists, redo the twist tighter.
- Practice the twist several times to gain confidence.
| Problem | Solution |
|---|---|
| Slippery rope | Switch to a rougher texture. |
| Short tail end | Use longer rope. |
| Loose twist | Twist tighter and secure. |
With these tips and some practice, your twist will hold strong and your slip knot will be reliable.
Step 3: Pulling The Working End
Mastering the slip knot is crucial for various crafts and activities. In ‘Step 3: Pulling the Working End’, fine-tune your technique to ensure a perfect knot every time.
Identifying The Working End
Before pulling the knot tight, identify the working end. This is the rope part used to adjust the knot. It’s not fixed or attached to any load. Look for the free end that moves easily when pulled.
Correct Tension For The Working End
Apply the right tension to the working end. Pull steadily, not too hard or too soft. This ensures your slip knot closes securely but remains easy to adjust or undo as needed. Feel the knot forming as you pull, stopping when it is snug.
- Grasp the working end between fingers.
- Pull it parallel to the standing line.
- Adjust tension by pulling more or less.
- Check the knot’s firmness with a gentle tug.
Step 4: Tightening The Knot
Step 4: Tightening the Knot is crucial for the slip knot’s effectiveness. This step ensures the knot holds securely while allowing adjustments as needed. Let’s learn how to fasten this versatile knot properly.
How To Secure The Slip Knot
- Pull on the standing line while holding the tail.
- Ensure the knot coils snugly without overlapping.
- Test the knot by gently tugging on both ends.
Adjusting The Knot’s Size
- Hold the knot between your thumb and forefinger.
- Pull the tail to reduce the loop’s size.
- Slide the knot along the standing line to enlarge the loop.
- Check the loop size and adjust as needed.
Step 5: Practice Makes Perfect
Step 5: Practice Makes Perfect is crucial when learning the slip knot. Regular practice helps you master this essential skill quickly. Let’s dive into how you can make your practice sessions both effective and enjoyable.
Tips For Consistent Practice
- Set a daily practice time. Consistency is key.
- Keep your materials ready and accessible.
- Start with short sessions and gradually increase the duration.
- Record your progress in a notebook to track improvements.
Creative Exercises For Skill Improvement
- Challenge yourself with different thicknesses of rope.
- Create a goal to make 10 perfect knots in a row.
- Teach someone else how to tie a slip knot. It reinforces your knowledge.
By integrating these practices, you’ll see a significant improvement in your slip knot skills. Enjoy the learning journey!
Advanced Slip Knot Techniques
Mastering the art of tying knots is crucial for a variety of tasks. The slip knot is one such knot that stands out for its versatility and ease of untying. Skilled individuals often look beyond the basic slip knot to its more advanced techniques. These methods enhance efficiency and safety in numerous applications.
Variations Of The Basic Slip Knot
Understanding different slip knot variations can be a game-changer in many fields. Each variant has unique features tailored for specific uses.
- Yosemite Slip Knot – An extra twist provides greater security.
- Double Slip Knot – Two loops make it stronger and more adjustable.
- Slip Knot with a Stopper – A stopper knot prevents the slip knot from over-tightening.
Applications In Complex Tasks
Advanced slip knot techniques are not just for show; they serve practical purposes in complex tasks.
| Task | Technique | Benefit |
|---|---|---|
| Mountaineering | Yosemite Slip Knot | Prevents knot failure under tension |
| Fishing | Double Slip Knot | Adjusts loop size for different catches |
| Packaging | Slip Knot with a Stopper | Ensures packages stay secure in transit |
Safety Considerations
When working with ropes, safety is paramount. The slip knot, a quick-release knot, can be both versatile and risky. Proper use and rope inspection are crucial to prevent accidents. Let’s delve into the safety protocols for using a slip knot.
When To Use (and Not To Use) A Slip Knot
Use a slip knot when you need a temporary hold that can be released quickly. It’s ideal for situations where adjustment or quick release is necessary, such as securing animals or temporary shelters. Do not use a slip knot in climbing, lifting heavy loads, or where it can tighten unintentionally. Always prioritize safety.
- Use for:
- Quick-release needs
- Adjustable ties
- Avoid for:
- Climbing
- Heavy lifting
- Uncontrolled tightening
Inspecting Ropes For Wear And Tear
Regularly inspect your ropes to ensure they are safe for use. Look for signs of damage such as fraying, cuts, or excessive wear. Replace ropes that show any of these signs. A damaged rope can fail, leading to dangerous situations.
| Inspection Point | Action |
|---|---|
| Fraying | Replace rope |
| Cuts | Replace rope |
| Wear | Replace rope |
Ensure each rope is suitable for its intended use. Match rope strength and type to the task at hand. Keep ropes clean and dry to prevent degradation. Store ropes neatly, away from direct sunlight and chemicals.
Conclusion: The Art Of Knot Tying
Knot tying is more than a skill—it’s an art. Mastering the slip knot opens a world of possibilities. It’s a journey of patience, precision, and practicality. Let’s reflect on the learning path and encourage ongoing practice.
Reflection On The Learning Process
Learning to tie a slip knot has been an adventure. Like any skill, it started with the basics. You learned to loop the rope, adjust the knot, and secure it safely.
- Practice makes perfect.
- Mistakes help us grow.
- Patience leads to improvement.
Encouragement To Continue Practicing
Don’t stop now! Your knot-tying journey has just begun. Keep these tips in mind:
- Regular practice builds muscle memory.
- Challenge yourself with new knots.
- Share your skills with friends and family.
Keep tying knots! Your skills will grow, and you’ll discover the joy of this timeless craft.

Frequently Asked Questions
What Is A Slip Knot Used For?
A slip knot is commonly used to create an adjustable loop, useful for knitting, securing objects, or as a temporary stopper knot in climbing and sailing.
How Do You Make A Simple Slip Knot?
To create a simple slip knot, take a piece of string and form a loop. Pull a bit of the string through this loop, creating a smaller loop. Tighten by pulling on the tail end while holding the standing line.
What Are The Benefits Of A Slip Knot?
A slip knot offers easy adjustability and quick release functionality, making it ideal for temporary holds and situations requiring frequent adjustments. It’s simple to tie and untie.
What Is The Knot To Stop Slippage?
The best knot to prevent slippage is the constrictor knot. It tightly secures ropes and ensures minimal movement, making it highly reliable for critical applications.
Conclusion
Mastering the slip knot is an essential skill for various crafts and activities. From knitting to sailing, it provides a strong, adjustable loop that’s easy to untie. Embrace this versatile knot to enhance your projects and ensure secure, reliable loops every time.
Happy knotting!

