Fishing rods can break for various reasons, such as high tension or accidental drops. Understanding how to fix a snapped fishing rod can save you money and extend the life of your gear. Start by cleaning the broken sections thoroughly to ensure a strong bond.
Use a high-quality epoxy glue to join the broken parts. After the glue dries, wrap the repaired area with a fiberglass cloth for added strength. This simple method can restore functionality and get you back to fishing. Always handle your rod with care to avoid future breaks. Proper maintenance and timely repairs keep your fishing adventures smooth and enjoyable.
Introduction To Fishing Rod Repair
Fishing rods break sometimes. Learning to fix them is useful. This guide will help you understand how to repair a snapped fishing rod.
The Angler’s Nightmare: A Broken Rod
A broken rod is every angler’s nightmare. It can ruin a good day of fishing. Knowing how to repair it can save the day.
Here are some common reasons rods break:
- Accidental drops
- Excessive pressure
- Wear and tear
Importance Of Timely Repairs
Timely repairs prevent further damage. They also ensure your rod lasts longer. Fixing a broken rod quickly can save you money.
Here are the benefits of timely repairs:
| Benefits | Details |
|---|---|
| Cost-effective | Repairing is cheaper than replacing. |
| Longer lifespan | Repairs extend your rod’s life. |
| Better performance | A well-maintained rod performs better. |
Follow these steps for a simple repair:
- Identify the break.
- Gather repair materials.
- Clean the broken area.
- Apply the bonding agent.
- Wrap with a strong tape.
- Let it dry.
Repairing a rod is easy with the right steps. Happy fishing!
Assessing The Damage
Before fixing a snapped fishing rod, first assess the damage. Understanding the extent of the break helps decide the next steps. Examine the rod carefully to understand the nature of the break.
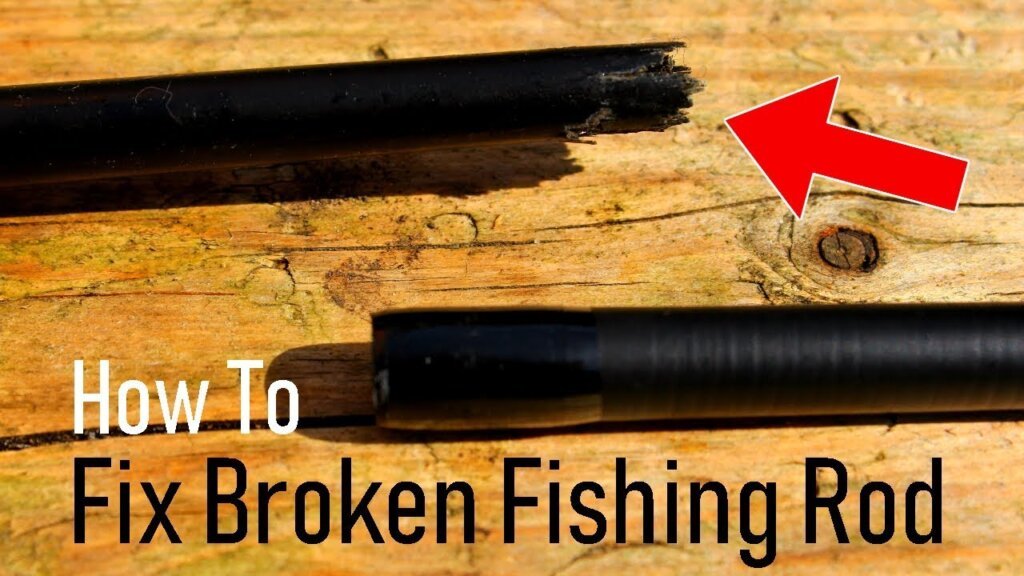
Identifying The Break
To identify the break, inspect the rod thoroughly. Check if the rod snapped in the middle or near the tip. A break near the tip is usually easier to fix. Look for any splintered or frayed parts. This helps determine the best repair method.
- Middle Break: More challenging to repair.
- Tip Break: Easier to fix and maintain.
When To Repair Vs. Replace
Decide whether to repair or replace the rod based on the break’s severity. If the break is severe, replacement might be the best option. Minor breaks can often be repaired with a few simple steps. Consider the cost of repair versus the cost of a new rod.
| Condition | Action |
|---|---|
| Minor Break | Repair |
| Severe Break | Replace |
Repairing a rod saves money but might not restore full strength. Replacing ensures the rod is strong and reliable for future use.
Gathering The Right Tools
Before you start fixing a snapped fishing rod, gather the right tools. Having the correct tools ensures a successful repair. This step is crucial for a smooth process.
Essential Repair Kit Items
To fix a fishing rod, you need specific items. Here is a list of essential repair kit items:
- Epoxy glue: Bonds the broken pieces securely.
- Sandpaper: Prepares the surface for bonding.
- Scissors: Cuts materials to the right size.
- Rod wrapping thread: Secures the repaired section.
- Heat gun: Helps the glue set faster.
Substitute Tools You Can Find At Home
If you lack some items, use substitutes from home. Here are some alternatives:
- Super glue: Use instead of epoxy glue for small repairs.
- Nail file: Works as a substitute for sandpaper.
- Kitchen scissors: Can replace specialized scissors.
- Sewing thread: Can act as rod wrapping thread.
- Hair dryer: Use instead of a heat gun.
By gathering these tools, you are ready to repair your fishing rod.

Preparation For Repair
Repairing a snapped fishing rod requires careful preparation. Proper preparation ensures a strong and durable fix. Below are steps to prepare for the repair process.
Cleaning The Broken Surfaces
First, clean the broken surfaces of the rod. Dirt and debris can weaken the repair. Use a soft cloth and gentle cleaning solution.
- Remove any dirt or debris.
- Dry the area with a clean, dry cloth.
- Ensure the surfaces are completely clean.
Securing The Rod For Repair Work
Next, secure the rod to prevent movement during repair. This step is crucial for precision.
You can use a vise or clamps to hold the rod steady. Follow these steps:
- Place the rod in the vise or clamps.
- Ensure the broken ends are aligned properly.
- Tighten the vise or clamps to hold the rod firmly.
Now, the rod is ready for the repair process. Proper preparation ensures a strong and lasting repair.
Spline Alignment Techniques
Spline alignment is crucial when fixing a snapped fishing rod. Proper alignment ensures the rod performs well. This guide will help you understand spline alignment techniques. Follow these steps for a smooth repair process.
Ensuring Proper Alignment
Ensuring the spline is aligned is essential. Misalignment can affect the rod’s action. To align the spline, follow these steps:
- Lay the rod pieces on a flat surface.
- Rotate each piece to find the natural bend or spline.
- Mark the spline with a pencil or tape.
- Align the splines of both pieces before gluing.
| Step | Action |
|---|---|
| 1 | Lay rod pieces flat. |
| 2 | Rotate to find the spline. |
| 3 | Mark the spline. |
| 4 | Align and glue. |
Tips For Maintaining Rod Action
Maintaining the rod’s action is vital. Here are some tips:
- Use high-quality glue for repairs.
- Apply even pressure while drying.
- Check the alignment regularly.
These tips will help keep your rod in top shape. Proper spline alignment and maintenance ensure your fishing rod performs well. Happy fishing!
Adhesive Application
Fixing a snapped fishing rod requires a strong adhesive. The right glue can make your rod as good as new. Follow these steps to ensure a secure bond.
Choosing The Right Adhesive
Selecting the correct adhesive is crucial. Epoxy glue is usually the best choice. It provides a strong and durable bond. You can find it in most hardware stores.
| Type of Adhesive | Strength | Availability |
|---|---|---|
| Epoxy Glue | High | Common |
| Super Glue | Medium | Common |
| Hot Glue | Low | Common |
Application Process For Maximum Hold
- Clean the snapped area with a cloth.
- Mix the epoxy glue as per instructions.
- Apply the glue on both broken ends.
- Press the ends together firmly.
- Hold for 2 minutes to let it set.
- Wrap the joint with tape for extra support.
- Let it dry for 24 hours.
Using the right adhesive and applying it properly ensures your rod is fixed securely. Your fishing rod will be ready for your next adventure.
Reinforcing The Break
Breaking a fishing rod can ruin a great day of fishing. Instead of buying a new rod, you can reinforce the break. This guide will show you how to strengthen the broken area.
Using Rod Wraps For Strength
Rod wraps are a popular way to reinforce a broken rod. They provide extra strength and stability. Follow these steps to use rod wraps:
- Clean the broken area with a cloth.
- Apply a thin layer of epoxy on the break.
- Wrap the rod wrap around the break tightly.
- Let it dry completely before use.
Rod wraps come in various materials like fiberglass and carbon fiber. Choose one that matches your rod’s material for the best results. This will make your rod almost as good as new.
Alternative Reinforcement Methods
If rod wraps are unavailable, try these alternative methods:
- Heat Shrink Tubing: Slide the tubing over the break. Heat it until it shrinks and tightens.
- Thread Wrapping: Use strong thread to wrap around the break. Apply epoxy over the thread for added strength.
- Wooden Dowel: Insert a small wooden dowel inside the rod. Glue it in place for internal support.
Each method has its pros and cons. Choose one based on the materials you have and the type of break. Reinforcing your rod can save you money and get you back to fishing quickly.
Finishing Touches
Fixing a snapped fishing rod doesn’t end with just mending the break. The final steps ensure your rod looks good and performs well. These finishing touches include sanding for smoothness and applying a protective coat.
Sanding For Smoothness
Once the repair is done, it’s time to sand the surface. This step is crucial for a sleek finish. Use fine-grit sandpaper for the best results.
Follow these steps:
- Wrap the sandpaper around the repaired area.
- Gently sand the area to remove any rough edges.
- Check the smoothness with your fingers.
Repeat until the surface feels even. Make sure not to sand too much.
Applying A Protective Coat
Next, apply a protective coat to seal the repair. This will protect the rod from water and dirt.
Here’s how to do it:
- Choose a high-quality epoxy or varnish.
- Use a small brush for precision.
- Apply a thin, even layer over the repaired area.
- Let it dry completely before using the rod.
For extra durability, apply a second coat after the first one dries.
A well-finished rod not only looks great but also performs reliably. Follow these steps to ensure your rod is in top shape.
Testing And Maintenance
Once you’ve repaired your snapped fishing rod, testing and maintenance are crucial. These steps ensure your rod remains strong and reliable. Regular checks can help you catch more fish and enjoy your fishing trips.
Performing A Stress Test
Start by performing a stress test on the repaired rod. This test helps you check the rod’s strength and flexibility. Follow these simple steps:
- Hold the rod by its handle.
- Bend the rod gently, applying pressure evenly.
- Look for any cracks or weak spots.
- Listen for any unusual sounds like creaking.
If the rod passes the stress test, it’s ready for fishing. Otherwise, you may need to repair it again.
Ongoing Care For Repaired Rods
Ongoing care is vital for your repaired fishing rod. Here are some tips to keep it in top shape:
- Clean the rod after each use.
- Store it in a cool, dry place.
- Check for any damage regularly.
- Use a rod sleeve for extra protection.
Replace any damaged parts immediately. Keep your rod out of extreme temperatures. Avoid overloading your rod with too much weight.
By following these maintenance tips, your repaired rod will last longer. Enjoy many successful fishing trips with a strong and reliable rod.
Prevention Tips
Fixing a snapped fishing rod can be frustrating. Prevention is the best strategy. Follow these prevention tips to keep your fishing rod safe and functional.
Proper Handling And Storage
Always handle your fishing rod with care. Avoid bending it too much. Use both hands to support the rod. This ensures even distribution of pressure.
- Store your rod in a cool, dry place.
- Use a rod holder or rack to prevent falls.
- Cover the rod with a protective sleeve or case.
| Do | Don’t |
|---|---|
| Handle with care | Bend the rod too much |
| Use both hands to support | Leave it exposed to weather |
| Store in a rod holder | Throw it in the trunk carelessly |
Avoiding Common Mistakes
Some mistakes can easily damage your fishing rod. Learn what to avoid.
- Overloading: Do not use line or lures heavier than recommended.
- Poor Casting: Avoid casting into rocks or other hard surfaces.
- Improper Transportation: Never transport your rod without protection.
- Ignoring Maintenance: Clean and inspect your rod regularly.
By following these tips, you can prevent your fishing rod from snapping. Handle it with care and avoid common mistakes.
Credit: www.reddit.com
Frequently Asked Questions
Can A Snapped Fishing Rod Be Repaired?
Yes, you can repair a snapped fishing rod. Use a repair kit or seek professional help. Repairing restores functionality.
Can You Superglue A Broken Fishing Rod?
Superglue can temporarily fix a broken fishing rod, but it’s not a permanent solution. For better results, use a rod repair kit.
What Is The Best Glue For Fishing Rod Repair?
Epoxy glue is the best for fishing rod repair. It offers strong adhesion, durability, and water resistance, ensuring a reliable fix.
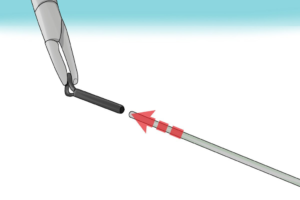
How To Repair A Broken Tip Of A Fishing Rod?
To repair a broken fishing rod tip, remove the damaged tip. Attach a new tip with hot glue or epoxy. Ensure it’s securely in place. Let it dry completely before use.
Conclusion
Fixing a snapped fishing rod is simpler than it seems. Follow these steps for a quick repair. Your rod will be back in action in no time. Proper maintenance helps avoid future breaks. Enjoy uninterrupted fishing adventures with a well-cared-for rod.
Happy fishing!